1. Gestion de projet et documentation#
1.1 Goal of the week#
- to learn about git and GitLab and how to use or install them.
- to start documenting and to understand the process and importance of it
1.2 Git and GitLab#
I had never heard about git or GitLab before enrolling in this class, and I am using a MacBook so the process to install and configure git was a bit different from what the teacher showed us. In addition to the content on the course website, I went on google to be sure to understand everything and to do the right commands!
1.2.1 Install Git and homebrew#
To install Git, I had to install Homebrew via the terminal on mac. To do so I only had to type /bin/bash -c "$(curl -fsSL https://raw.githubusercontent.com/Homebrew/install/HEAD/install.sh)"
After that, we can install git via homebrew on the terminal with the command brew install git and verify with the command git --version
Here is the link to the website GitLab where you will find the best explanation
1.2.2 Configure Git#
To configure Git we can follow the 3 steps way explained on the website of Git. Those steps are to indentify ourself and to start using Git on our laptop.
1. NAME : git config --global user.name
2. EMAIL : git config --global user.email here use your ULB email address
3. CHECK: git config --global --list
1.2.3 SSH key#
Since GitLab can be changed locally (on our computer) and on the server, we created a security system with 2 SSH keys (private and public) to ensure secure communication between our computer and the server when working.
To set up an SSH key, you need to go to GitLab and go to your “user settings” to do so you can just click on your profile picture and then click on edit profil.
When you are in your settings, you can click on SSH Keys and then to Add new key
After that we can open our terminal and type in the command ssh-keygen and a pair of keys (one private and one public) will be generated and automatically saved on your computer.
We can then go back to GitLab in the Add new kwy section add copy-paste the public key. Be careful to never share the private key!
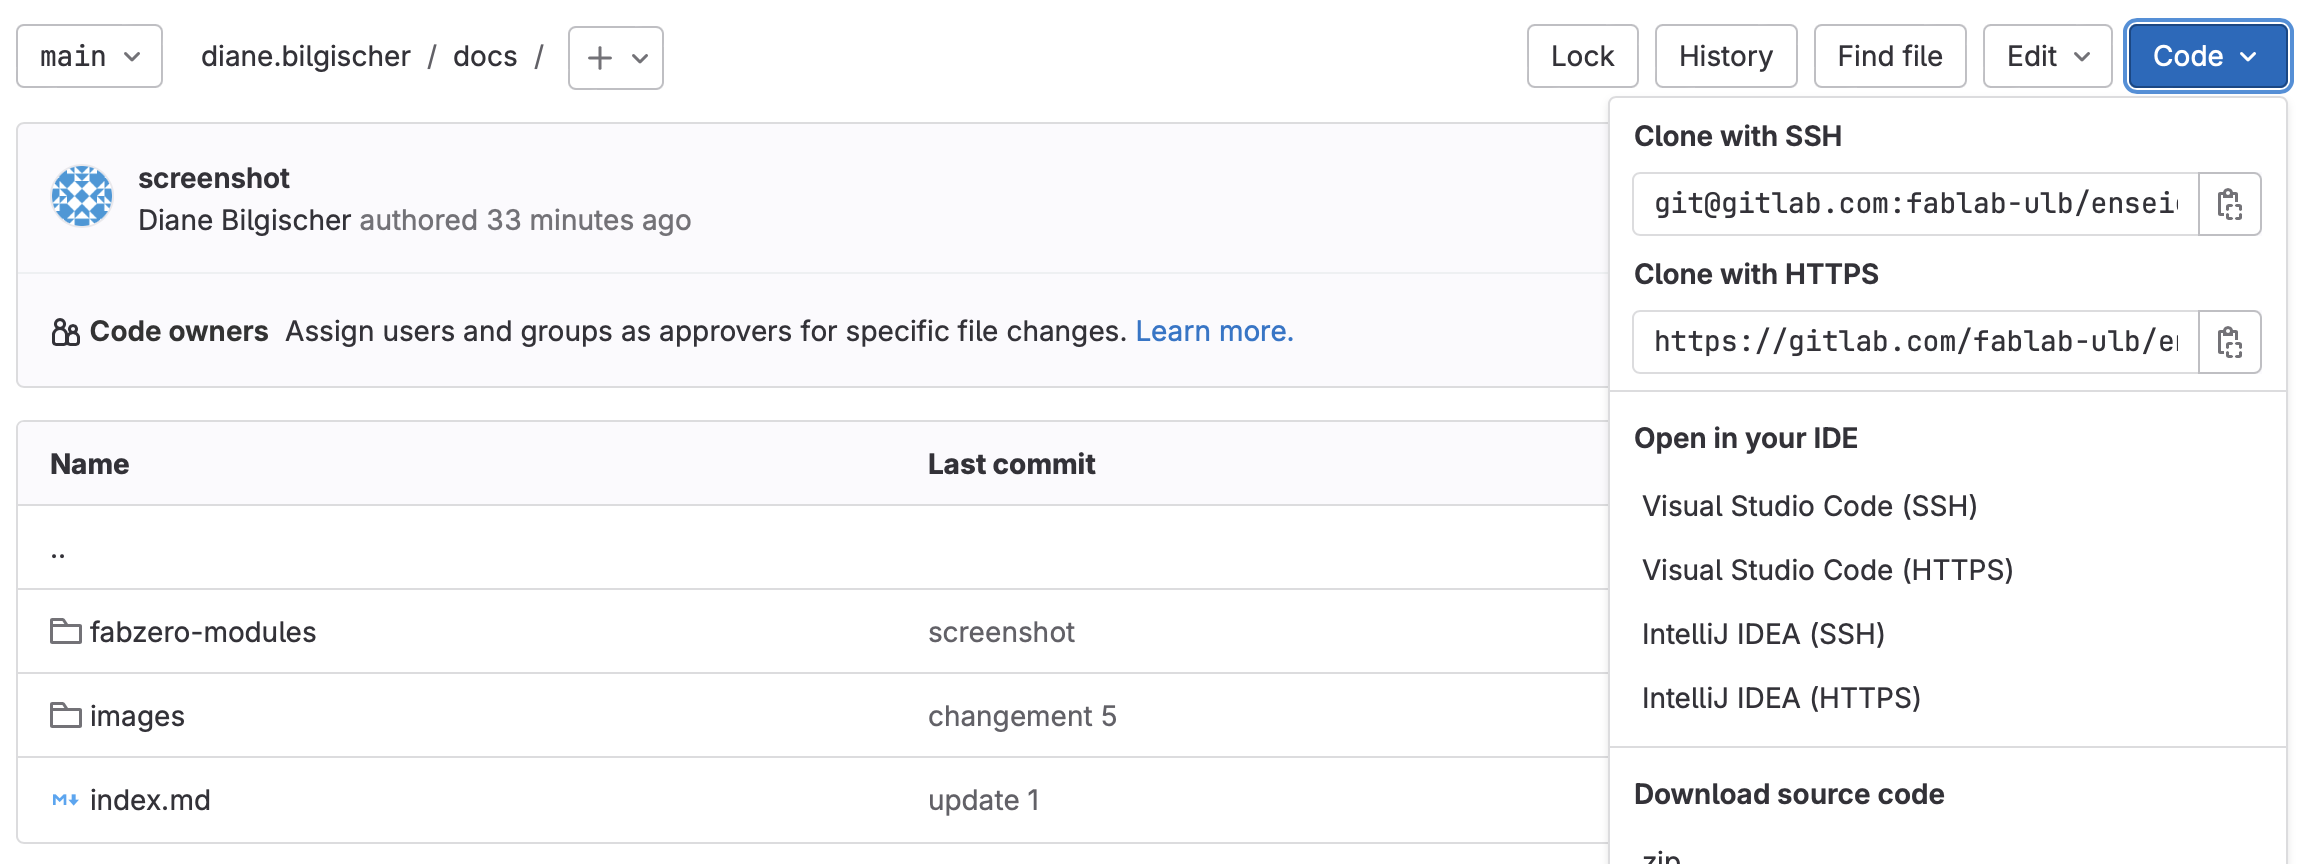
Finally, we will clone our repository with the SSH key. To do so we first need to copy our link to clone with SSH. to do so we first need to go on the module of the class in GitLab and then on your name. When you arrive on our page, you should fine a blue button with the word code on it. You can click on it and then copy the link Clone with SSH
 At that point, I made a mistake because I copied the wrong link
Clone with HTTPS but it wasn’t a big mistake. The only repercussion it had was that after every command git push I need to identify myself (username and password for GitLab)
After that we go in our terminal and type the command git clone 'url' the URL needed is the link we just copied.
After all these steps, we finally have a local copy of our website!
Here is a link to the GitLab website where you can find more information for point 1.2.2 and 1.2.3 !
1.3 Creat a presentation page#
On our personnal website of the class, we have to create a page to introduce ourselves. To do so we can use a text editor (here I use Visual Studio Code) and using the Markdown syntax. I have found on the internet this markdown cheatsheet that regroups all the information and commands we need to begging to write.
1.4 Transfer of information from Visual Studio Code to GitLab#
I decided to first do a preview on Visual Studio Code before uploading on Git Lab. To do so I just need to push on 3 keys at the same time : ‘command’ + ‘shift key’ + ‘v’. This is the combination on my laptop but since I have a MacBook it could be different on others laptop.
If I like the preview, I will do a first backup with the command ‘command’ + ‘S’. If the backup is well done than the white dot next the title of the file will disappear. Then we need to go in our terminal and write :
1. cd 'name of the file' –> to open the right file
2. git status –> to verify that there as been a modification
3. git add -A –> to add the modifications that we made
4. git commit -m "name of the modification your are making" –> naming the modification is just to help you and is not mandatory but I prefer to do it to stay organized.
5. git push –> to push the information to the server. We should be able to see the document with the modifications on GitLab but not on our website.
On the following picture, you can see how the commands look like in the terminal of my computer.

In our case, the information is automatically uploaded to our website 2 times per week so that we do not crash GitLab which may happen if too many people do it manually at the same time
1.5 GIMP#
Gimp is an open-source software to edit your pictures. To install it I’ve used Homebrew again and to do so I type brew tap homebrew/cask && brew install --cask gimp in my terminal. After that you go in your app in Finder (for Mac) and you should find Gimp there!
In my case, I mainly used it to reduce the number of pixels in a picture so that it has a smaller size and would take less storage place.
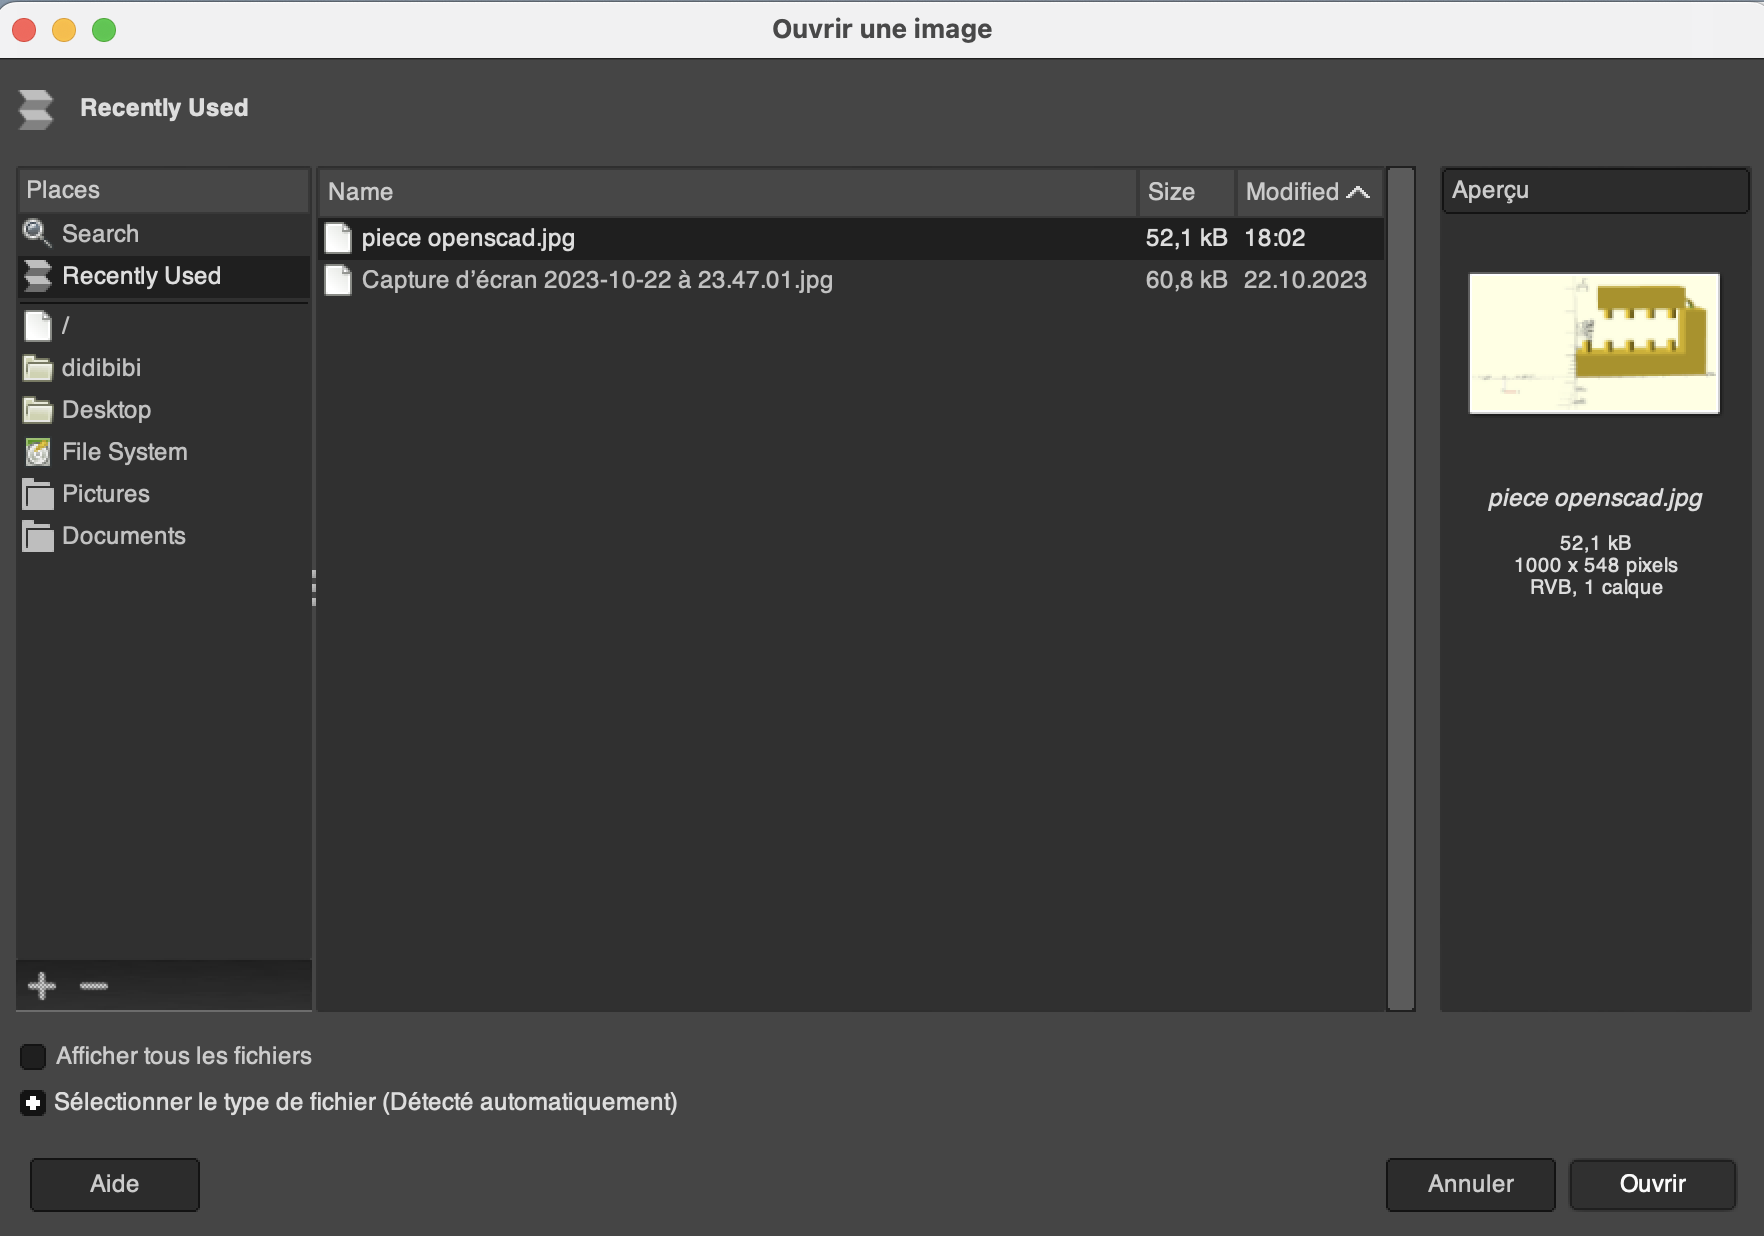
1. Open GIMP then press fichier and ouvrir to import the image. Select the picture and then click open then convertir

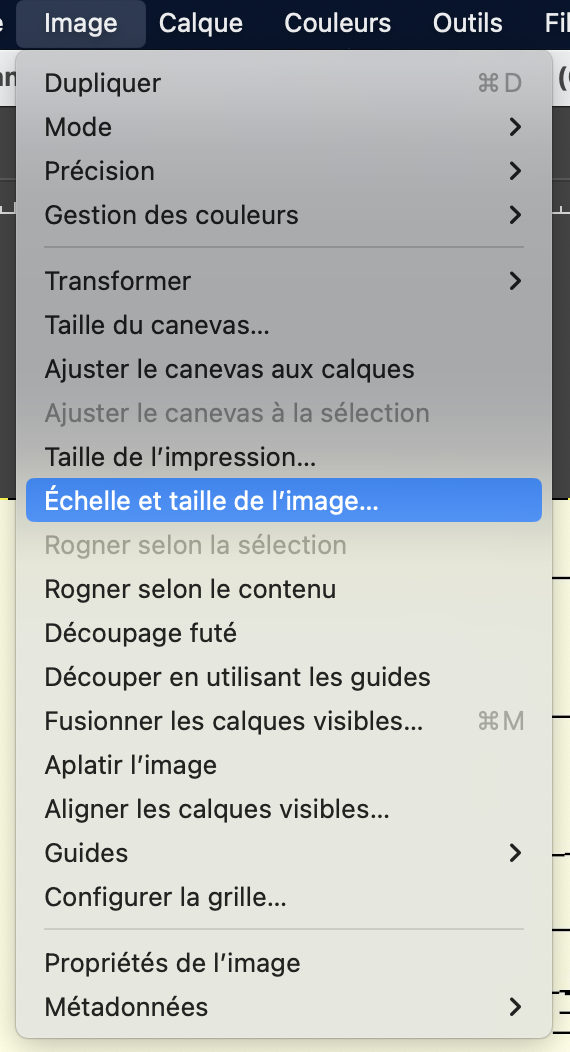
 2. Change the number of pixel. to do so you click on
 image then mise à l'échelle. When you change the value of the height or width, it will automatically change the other one to preserve the initial format.
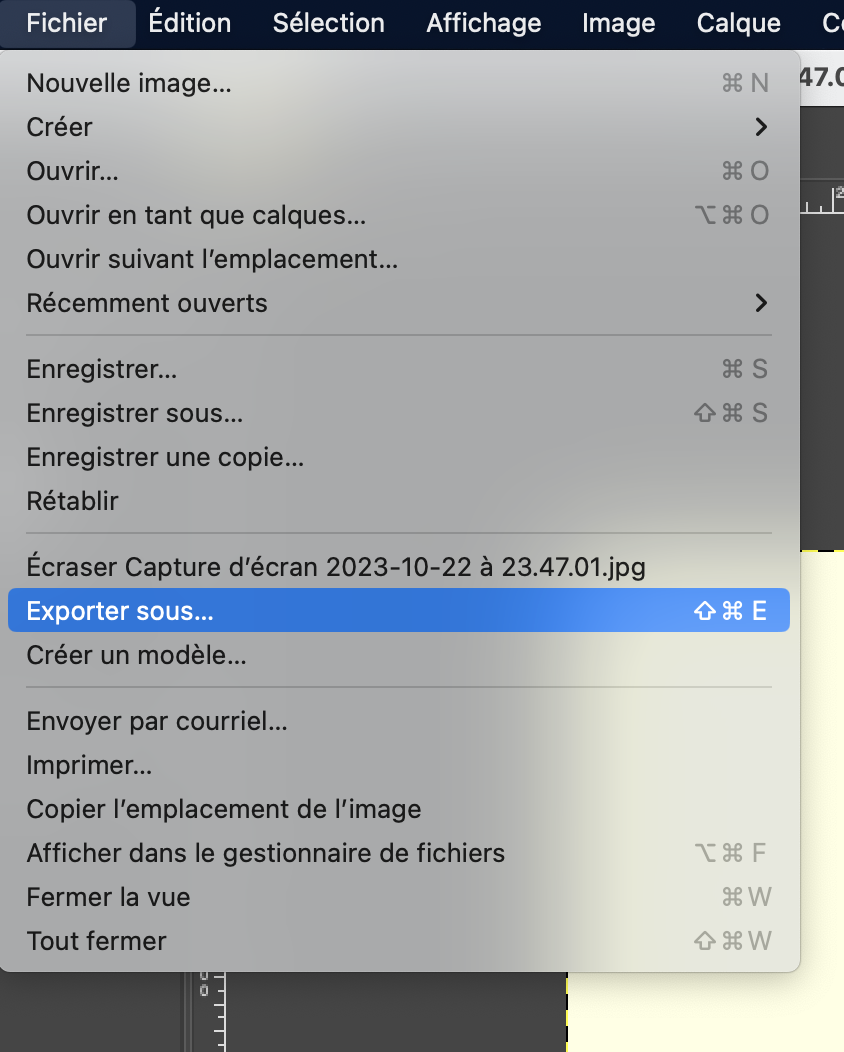
 3. Export the file by clicking on
 file then exporter sous. You can change the name of the file but also the quality of it to reduce the size of the file again. You can also change the export format, etc.
Here you have a link to a youtube video in french where all the tools are explaines and also how to reduce the number of pixels ! This software will be useful for all the modules!
1.6 Project management#
In addition to our personal project, we will also do a team project. Working in team is very different from working alone and to be sure that everything will go smoothly there are some techniques that we can put in place. Here are a few examples: 1. divide the work : completing the work in short tasks is easier and ensures that the work progresses at a good pace 2. establish a hierarchy of objectives according to their order of importance: this means focusing on the essential parts and leaving the details for later. 3. organize your time: a task will always take longer than expected and the work will pile up. we need to be well organized and leave free time in our schedule to be able to catch up on what could not be finished on time.
1.7 Issues#
To import the issues to your GitLab, you first need to download them in the module 6 on the website of the course.
Once you downloaded them you need to go in the section issues in GitLab and click on the three dot and then on Import CVS, choose a file and then click on Import issues
 You can then click on the issues and change the labels by clicking on
 edit and selecting the label corresponding to the module progresses
